I recently had to migrate my AD Connect to a new server since it was an older v1 version running on Server 2012. With the upcoming changes and enforcements for Azure AD to support TLS1.2 and AD Connect v1 end of life in Aug 2022, it was time to move it to a swanky new server. Here’s the processes and notes from my experience.
- Prereqs -
New Server 2016 or Above installed, Patched, and Ready to Go!
TLS 1.2 enabled on the new server
Latest ADConnect v2 installer
ADConnect Settings Export from the current active ADConnect install (I’ll go over this below)
Know how you will handle the 3 Accounts use to sync everything (I’ll go over this below)
Cloud Global Admin Account on Azure/M365 that is not tied to your Active Directory
Microsoft 365 Email Backups already in Place in case this all goes to shit
- Prep and AD Connect Config Export -
Verify you have access to your Microsoft 365 Email Backups in a service like Datto Backupify (and make sure they are current!!!).
If anything goes wrong or you miss a sync setting you could potentially wipe out your user’s accounts in the cloud. Having a recent backup of the data should you need to restore will save your butt. It will be a pain for sure if this happens but, prepare for the worst and hope for the best.
Take Screen Shots of your current AD Connect Config
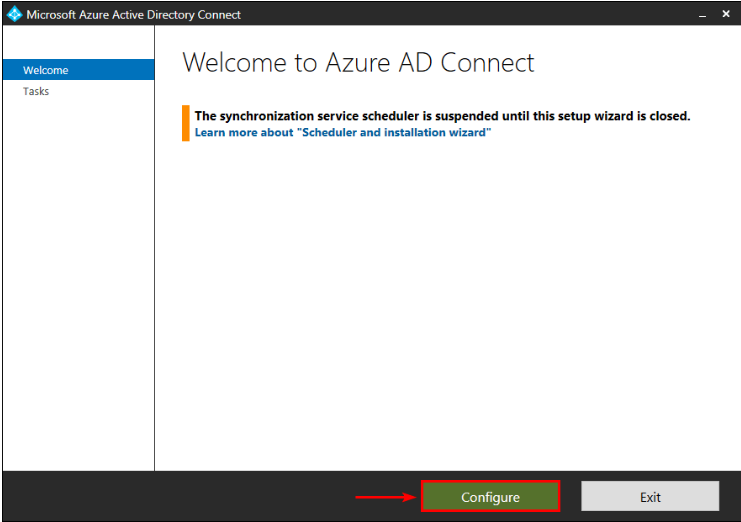
Start Microsoft Azure Active Directory Connect from the Programs Menu
Click Configure
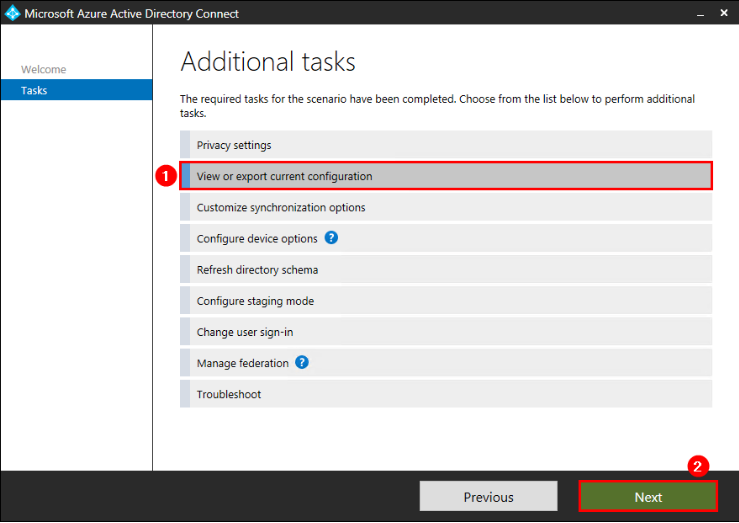
Click View or export current configuration and then hit Next.
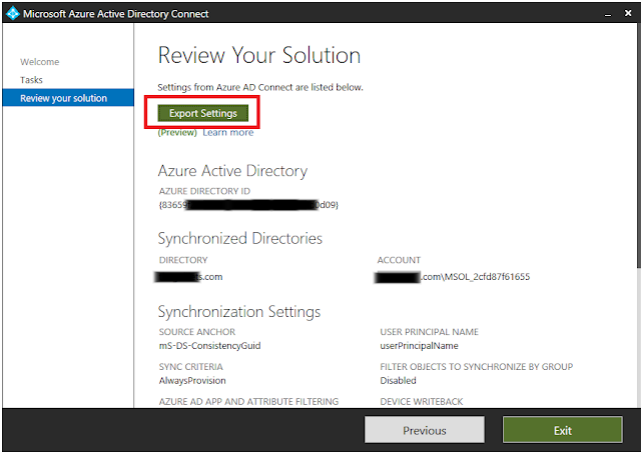
Take Screen shots of everything under the Review Your Solution for future refrece.
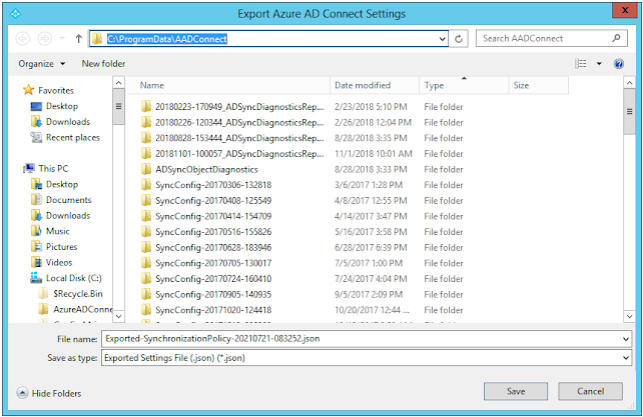
Export the Settings you screeshoted above to a JSON file via the Export Settings button and save it
***Note: Once you have the new server setup, you will want to grab this json file again from the new server setup and have it as a backup for the future as well since your ADConnect setup likley doesnt change often.
You will also need to screenshot the following User Sign-In Settings section since they are not exported in the json file
- Three(3) Azure AD Connect Accounts You Should Know -
***If you want to use custom accounts, make sure to set them up before you you install/configure the new ADConnect
Here is the functionality of the 3 accounts:
AD DS Connector account: used to read/write information to/from Windows Server Active Directory.
This account needs to have very specific permissions. It is also a very special account that needs monitored since it has permissions to make changes to your Active Directory and should be considered as sensitive as your Domain Admin Accounts.
If you choose to let the ADConnect Installer create a new account in Active Directory for you, then a new account will be added to the “Users” OU and will start with MSOL_**** with the necessary permissions.
ADSync service account: used to run the synchronization service and access the SQL database on the ADConnect Server.
This account is applied on the local AD Connect server and can be seen in the Services.mmc
This can be set to a GMSA account or a normal user account if you are connecting to SQL server hosted on another server.
(best option) If you do not specify a service account, it will use a local Virtual Service Account (VSA) and run as NT SERVICE\ADSync and will connect to the local instance of SQLExpress installed by the ADConnect.msi
Once the service is created and set, you cannot change it without a complete reinstall of ADConnect.
Azure AD Connector account: used to write information to Azure AD
This will be a cloud account and not in your local Active Directory
In Azure Active Directory it will be referenced as a “On-Premises Directory Synchronization Account” and start with Syn_*ADConnectServerName_**
You can NOT pre-create this account or control the naming convention. ADConnect will create this for you.
For detailed information about the types of permissions and accounts you can use under custom settings check Microsoft directly here
- New AD Connect Server Setup via Staging -
Enable TLS1.2 on the server via this script or grab it from Microsoft directly here. You will need to reboot once applied. Do this, otherwise the ADConnect installer will fail on you.
Download the Latest version of Azure AD Connect V2
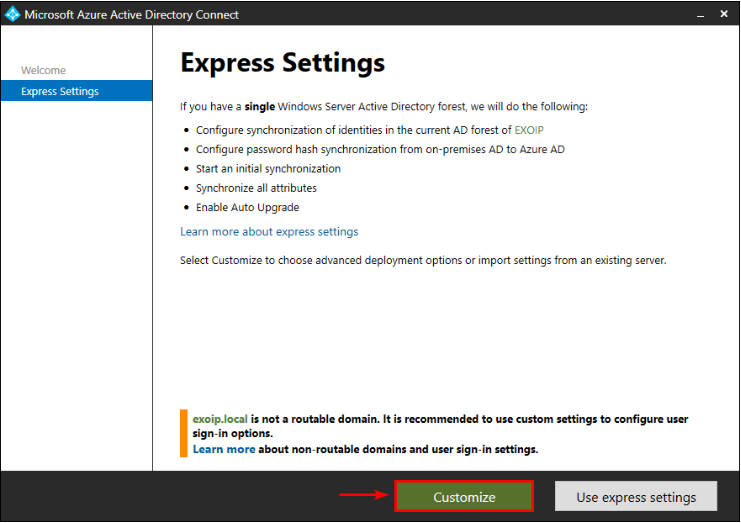
Run the AzureADConnect.msi file and agree to the terms.
Click Customize
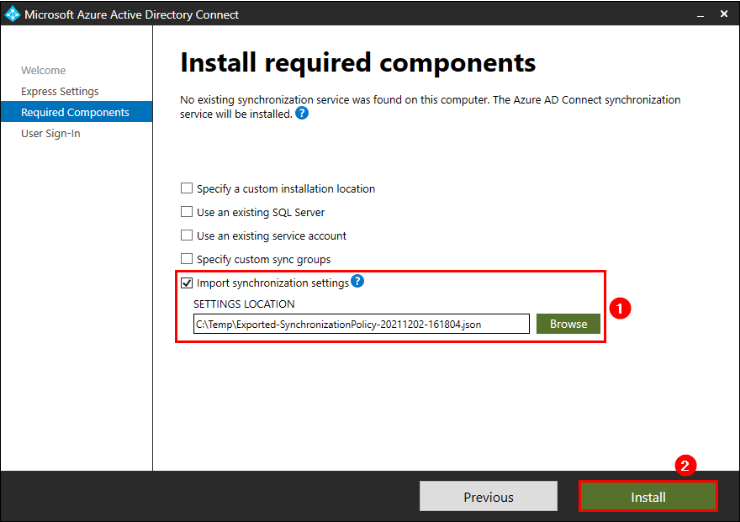
Import your settings from the old server
Optional:
Check the box for “Use an Existing Service account” if you want to use a specific GMSA or Windows Account for the Windows ADConnect Service instead of the NT SERVICE\ADSync account.
Check the box for Use an exiting SQL Server if you need to connect to the ADSync Database on a remote sql server
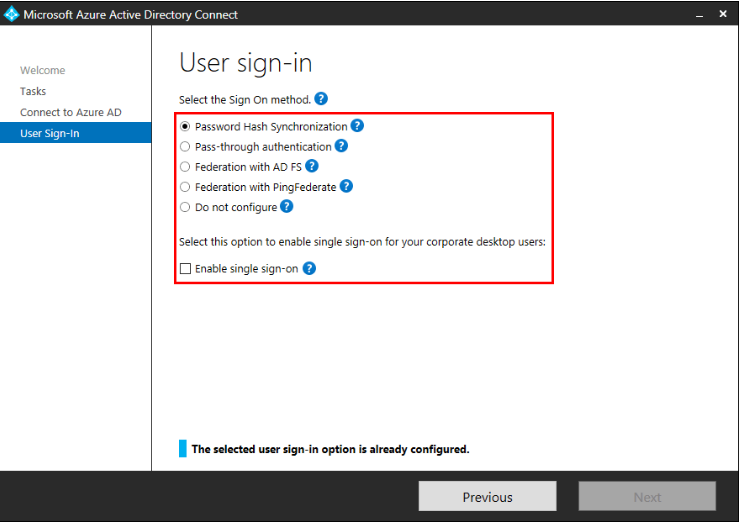
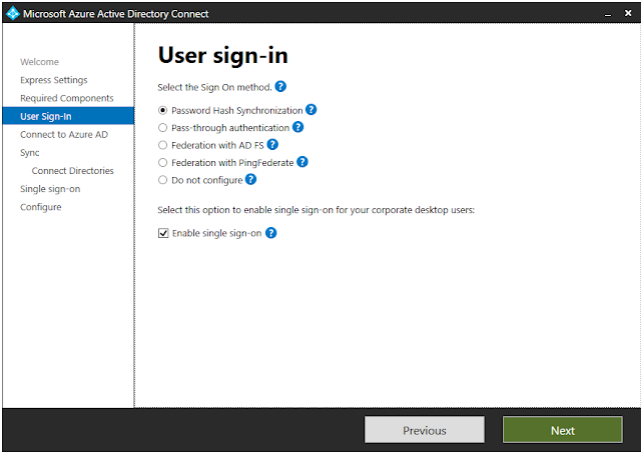
Make sure your User sign-in settings match your old server. In this example we are using Password Hash Sync with Single Sign-On enabled
Connect to Azure AD using your Global Azure Admin Creds
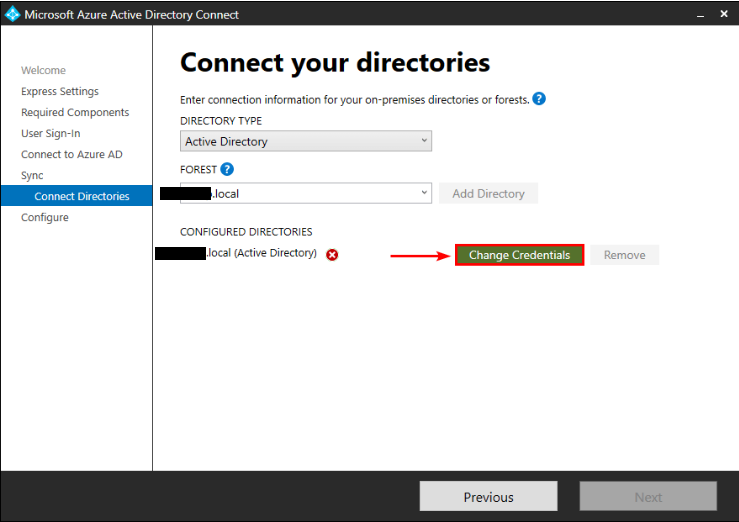
Re-Connect your Active Directory to ADConnect via the Change Credentials box
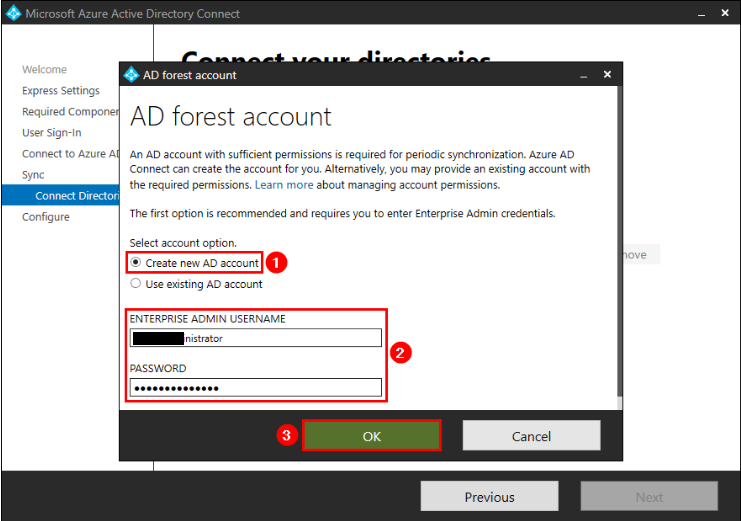
Choose to Use and Existing AD Account or Create New
If an Exisiting AD account make sure it has the appropriate permissions. It also can’t be a domain admin or enterprise admin account.
Otherwise let it create a new AD account for you (MSOL_****) with the appropriate permissions.
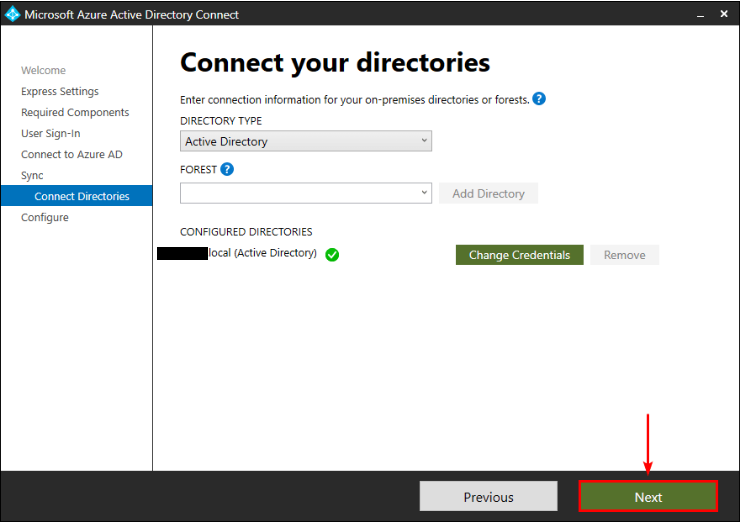
Select Next
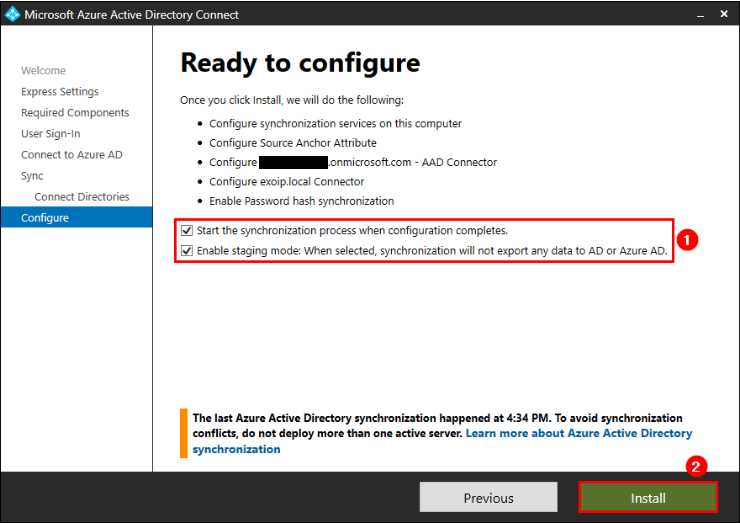
Enable both the sync process and staging mode
- Verify Settings -
Now we need to make sure that there are no major settings that were changed on the migration. If a source anchor was changed or your sync rules dont match this could result in you whiping out your cloud accounts or loosing mailboxes.
Use the Microsoft Azure AD Connect Configuration Documenter located here. This will give you a html report so that you can see all the settings and easily identify the differences between the 2 server configurations.
Download it to your local workstation
HTML Reporting
No app install needed, just unzip the folder
On the Old AD Connect Server Export the full configuration via powershell
Create a new folder under your local AzureAdConnectSyncDocumenter\Data Folder with your domain name
Copy the Pilot and Production folders from the steps above into the folder
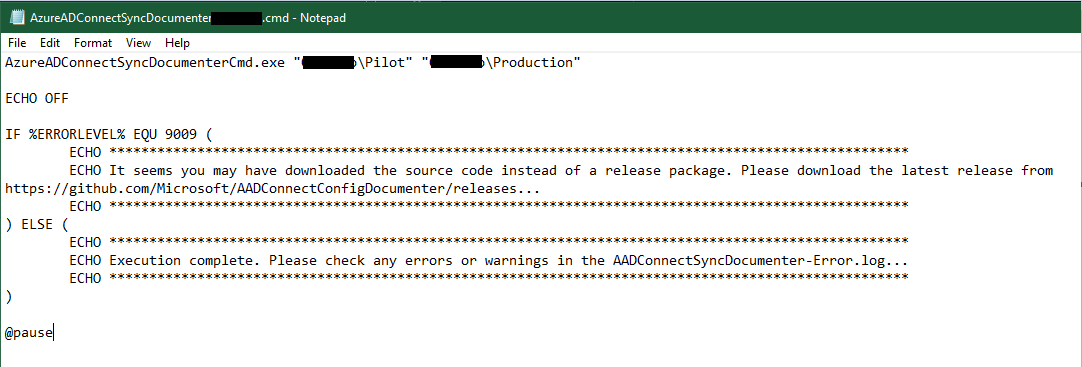
Create a copy of the AzureADConnectSyncDocumenter-Contoso.cmd file
Rename the AzureADConnectSyncDocumenter-Contoso.cmd file to AzureADConnectSyncDocumenter-yourdomainname.cmd
Edit the AzureADConnectSyncDocumenter-yourdomainname.cmd and update the folder path you set in Step 4.
Navigate to the AzureAdConnectSyncDocumenter\Report and find your HTML report
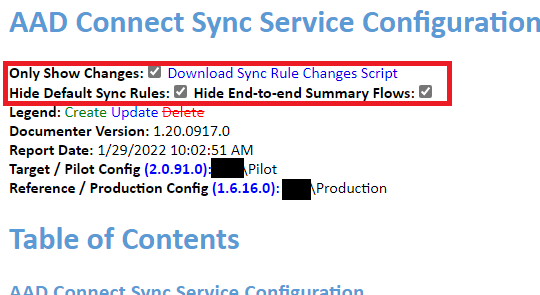
Select the Only Show Changes, Hide Default Sync Rules, and Hide End to End Summary Flows
There will be some differnces like limit increases, date/time stamps, etc…
If no major differneces then you are good to promote your staging server to prodcution!
- Enable Staging Mode on Old Server -
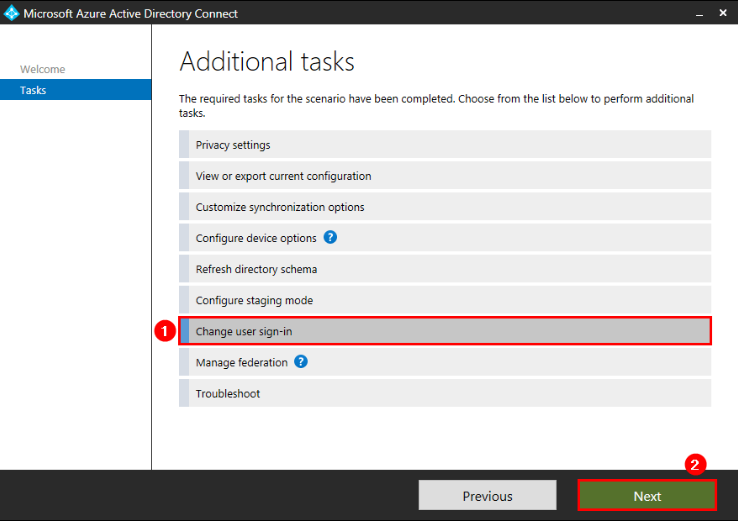
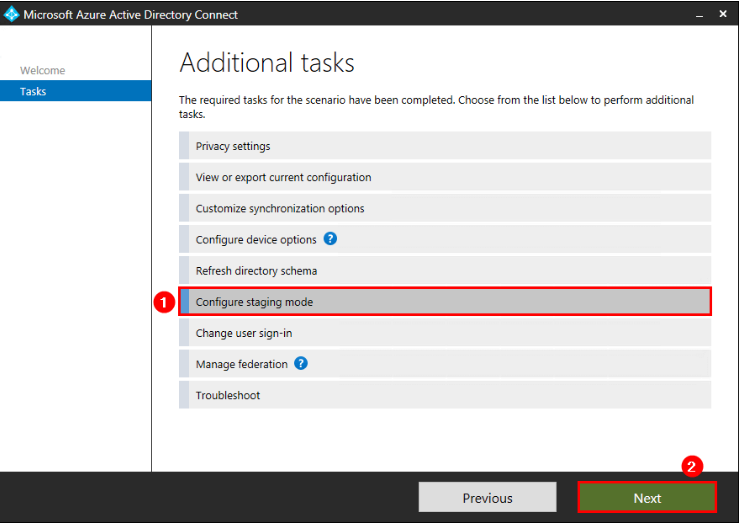
On the Old Server, start Microsoft Azure Active Directory Connect, Select Configure, then select Configure Staging Mode.
Enter your Azure AD Global Admin Creds
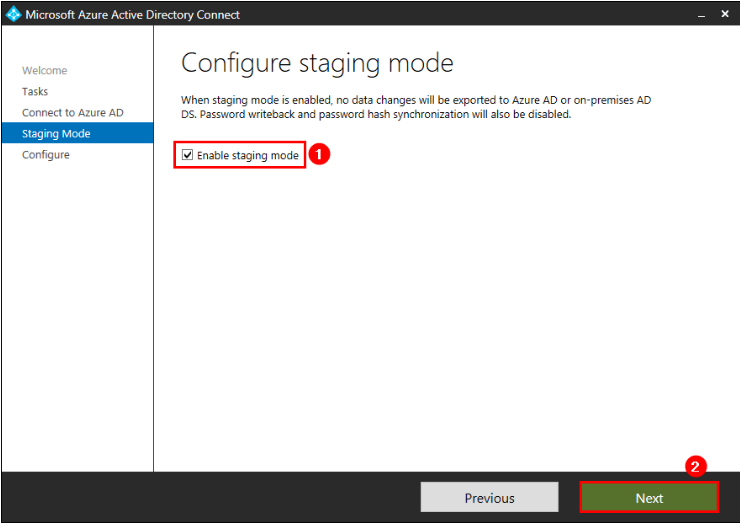
Select the box to Enable Staging Mode
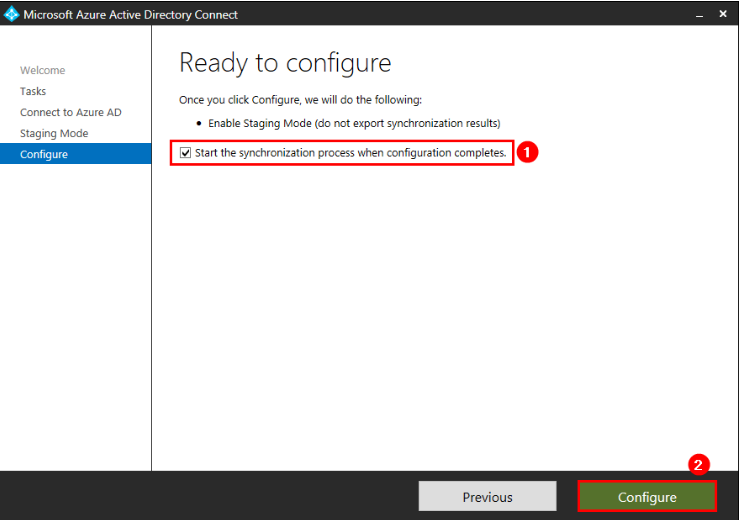
Select the box to Start the Sync Process and then click Configure
- Disable Staging Mode on New Server -
On the New Server, start Microsoft Azure Active Directory Connect, Select Configure, then select Configure Staging Mode.
Enter your Azure AD Global Admin Creds
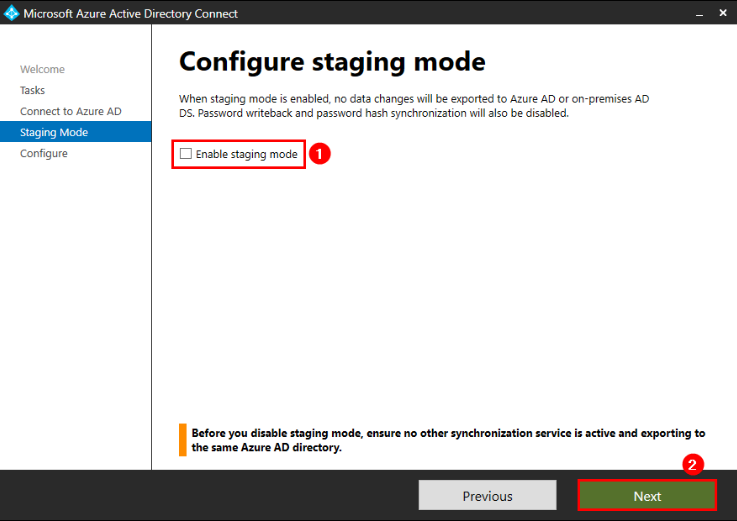
UnSelect the box to Enable Staging Mode
Select the box to Start the Sync Process and then click Configure
- Verify Sync -
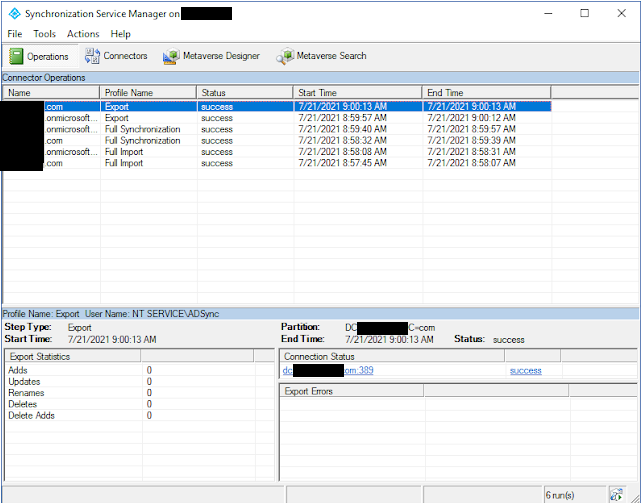
Start Azure Active Directory Synchronization Service Verify that the sync status shows as success
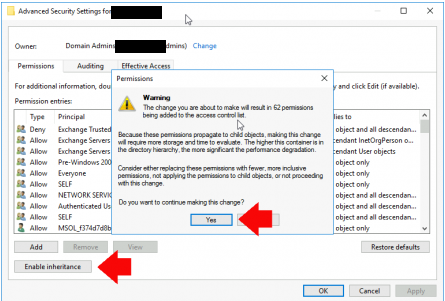
If you have a few select accounts with sync issues due to error 8443 (Insufficient access rights to perform this operation), go into the advanced security settings for the their individual user objects in Active Directory and select Enable inheritance on the user object.
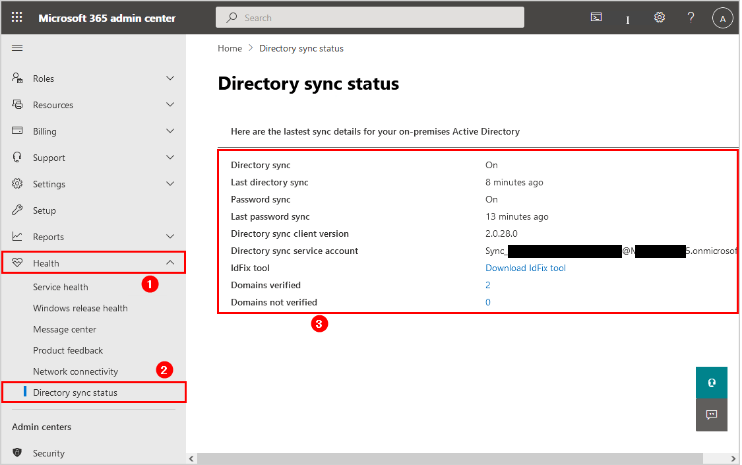
Sign into the Microsoft 365 Admin Center. Navigate to Health, then Directory Sync Status
It may take up to 3 hours for the New Directory sync service account to show up as the account in use on this screen
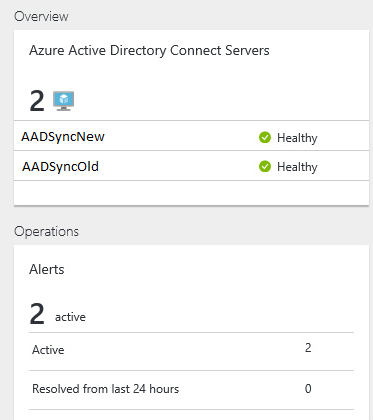
Sign into the Azure Portal, Navigate to Azure Active Directory, Then to Azure Active Directory Connect Health, and make sure the server shows as Healthy
It may take up to 3 hours for the error: Password Hash Synchronization heartbeat was skipped in last 120 minutes to clear as long as you are seeing successful syncing in step 2 above.
Verify users can sign in and that email is still working as expected.